The Glow Up: My Standard, Simple Makeup Routine
Every year or so, I write one of these and almost every year, nothing really changes. I’m a creature of habit when it comes to my skin, so switching up anything is a big deal (as witnessed by my skincare journey as of late, but that’s for another time because we haven’t figured it out just yet). As I’m in my mid-30s, I’m noticing my skin and, ultimately, my standard makeup routine has become a bit more needy and high maintenance. I’ve always been proud of not needing very much when it comes to clear and youthful skin, so the fact that I need even a little something more is mildly gut-wrenching. But I digress.
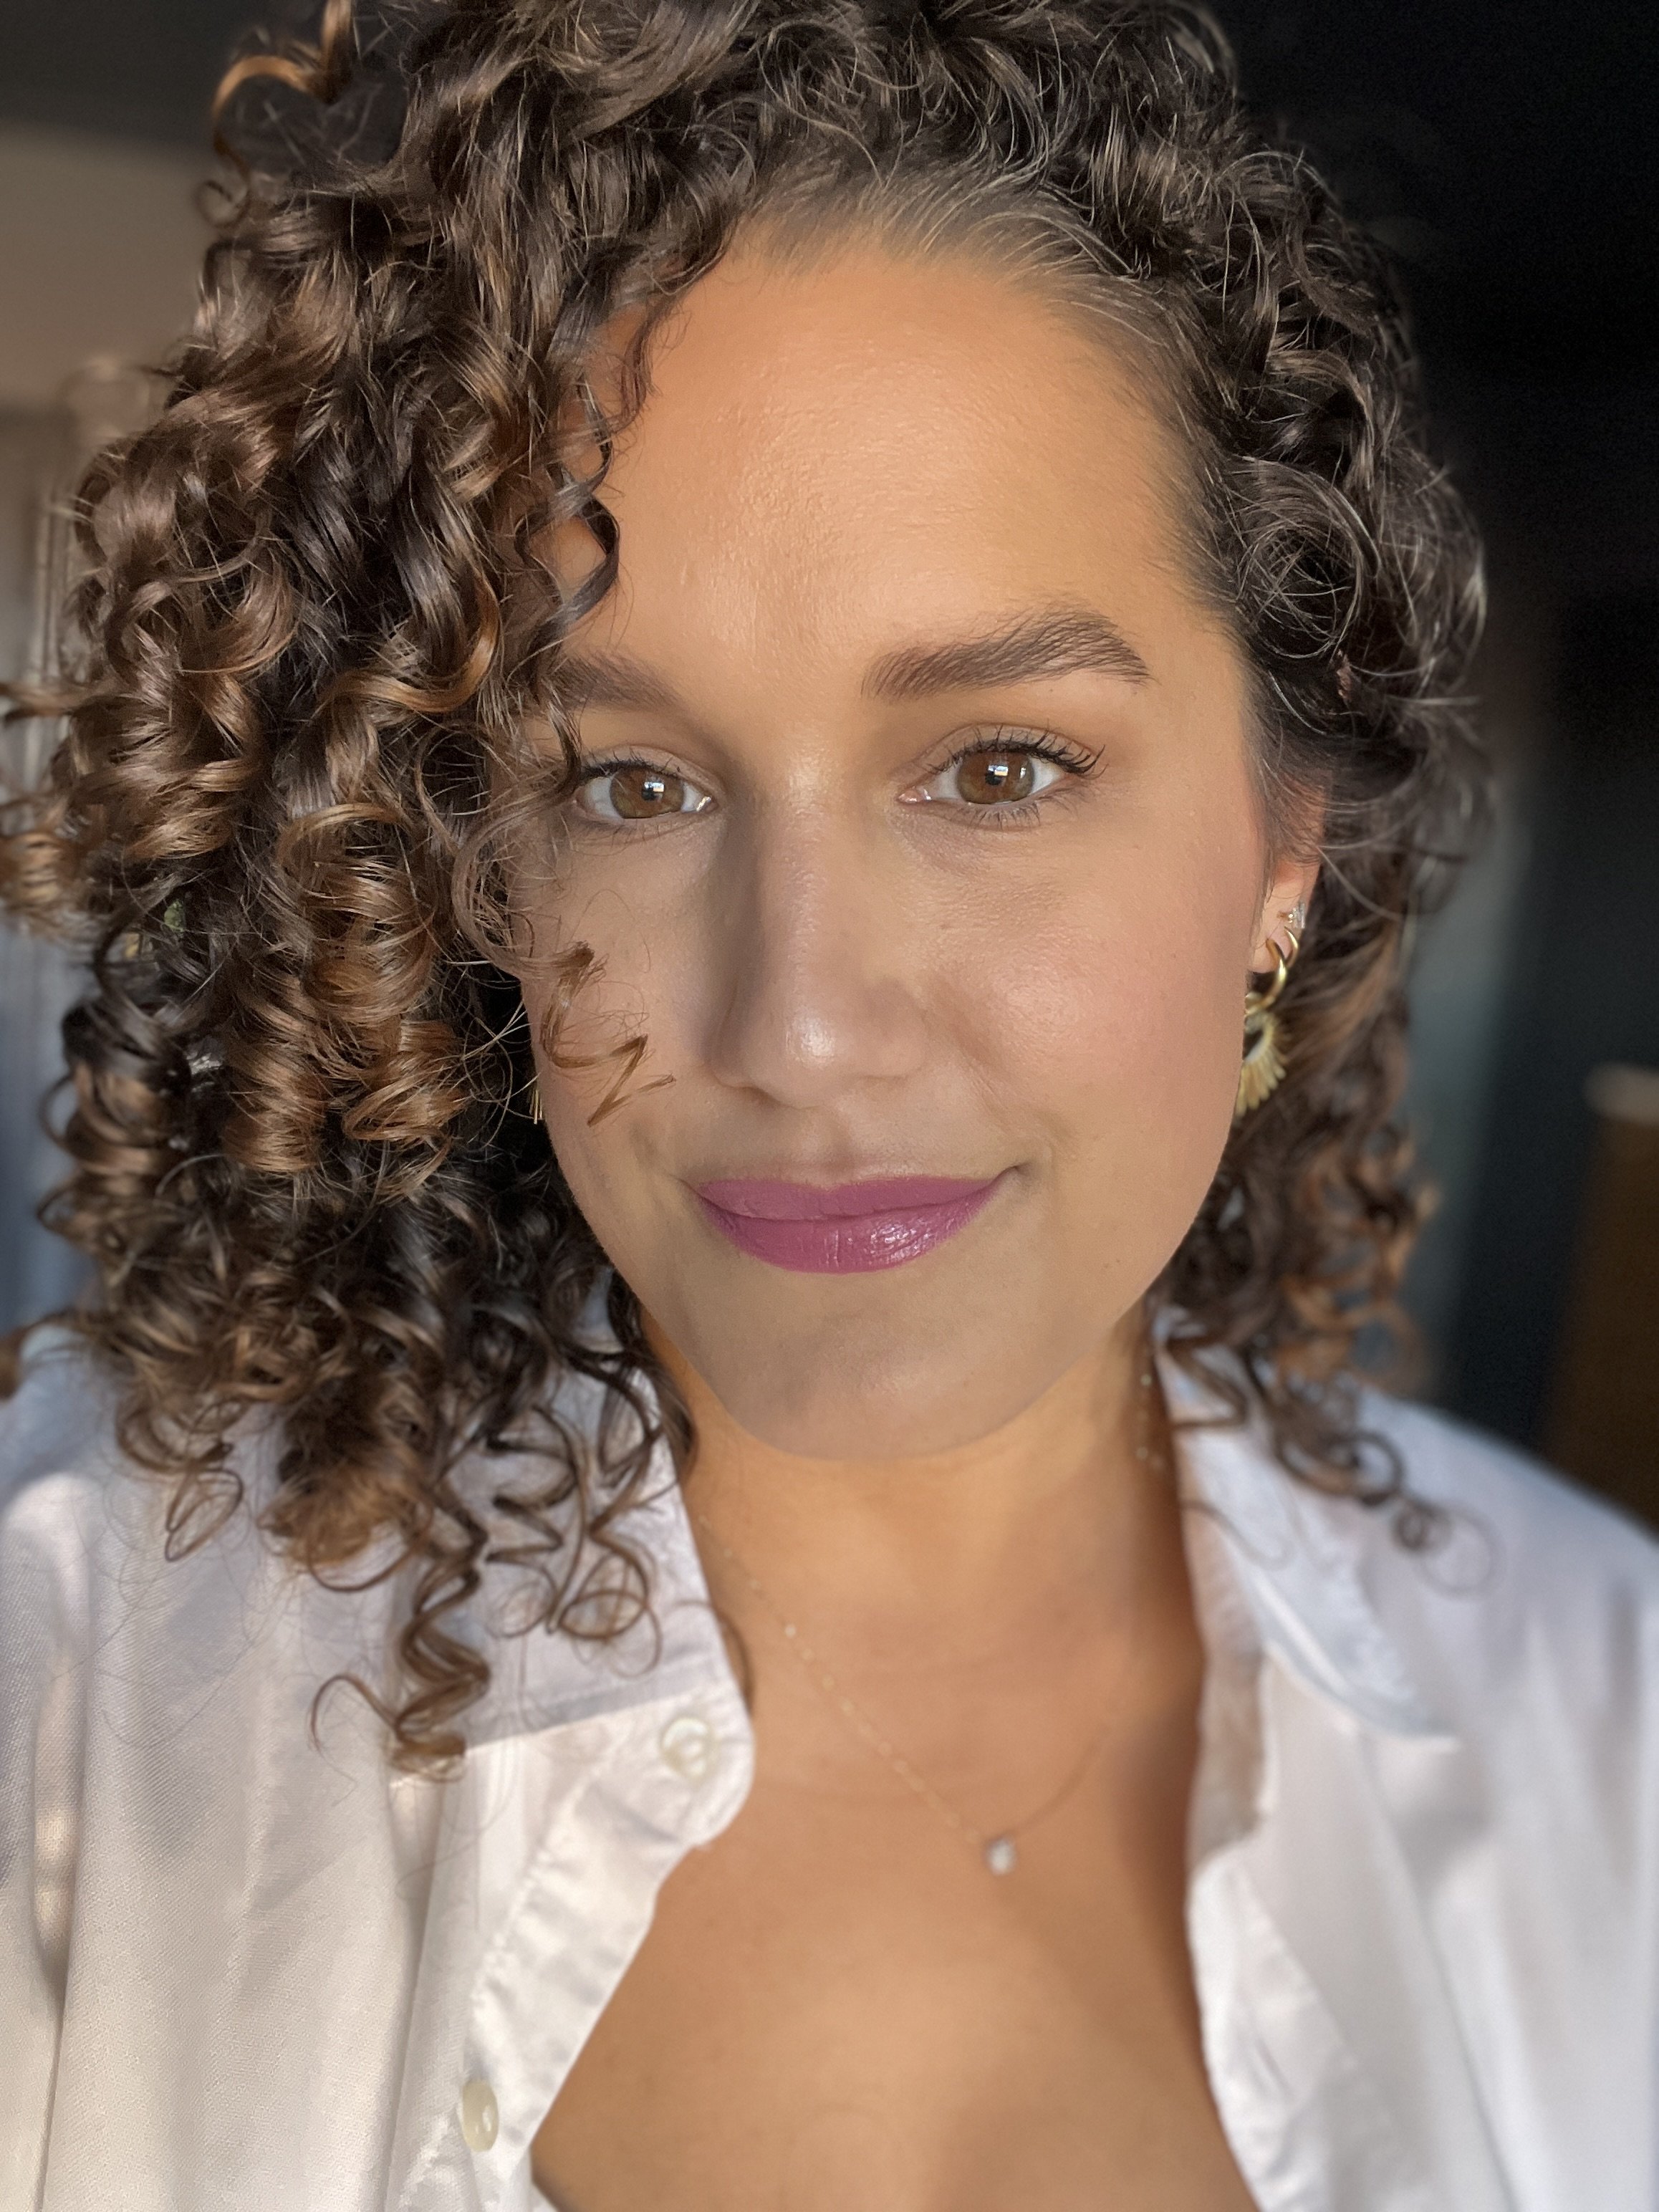
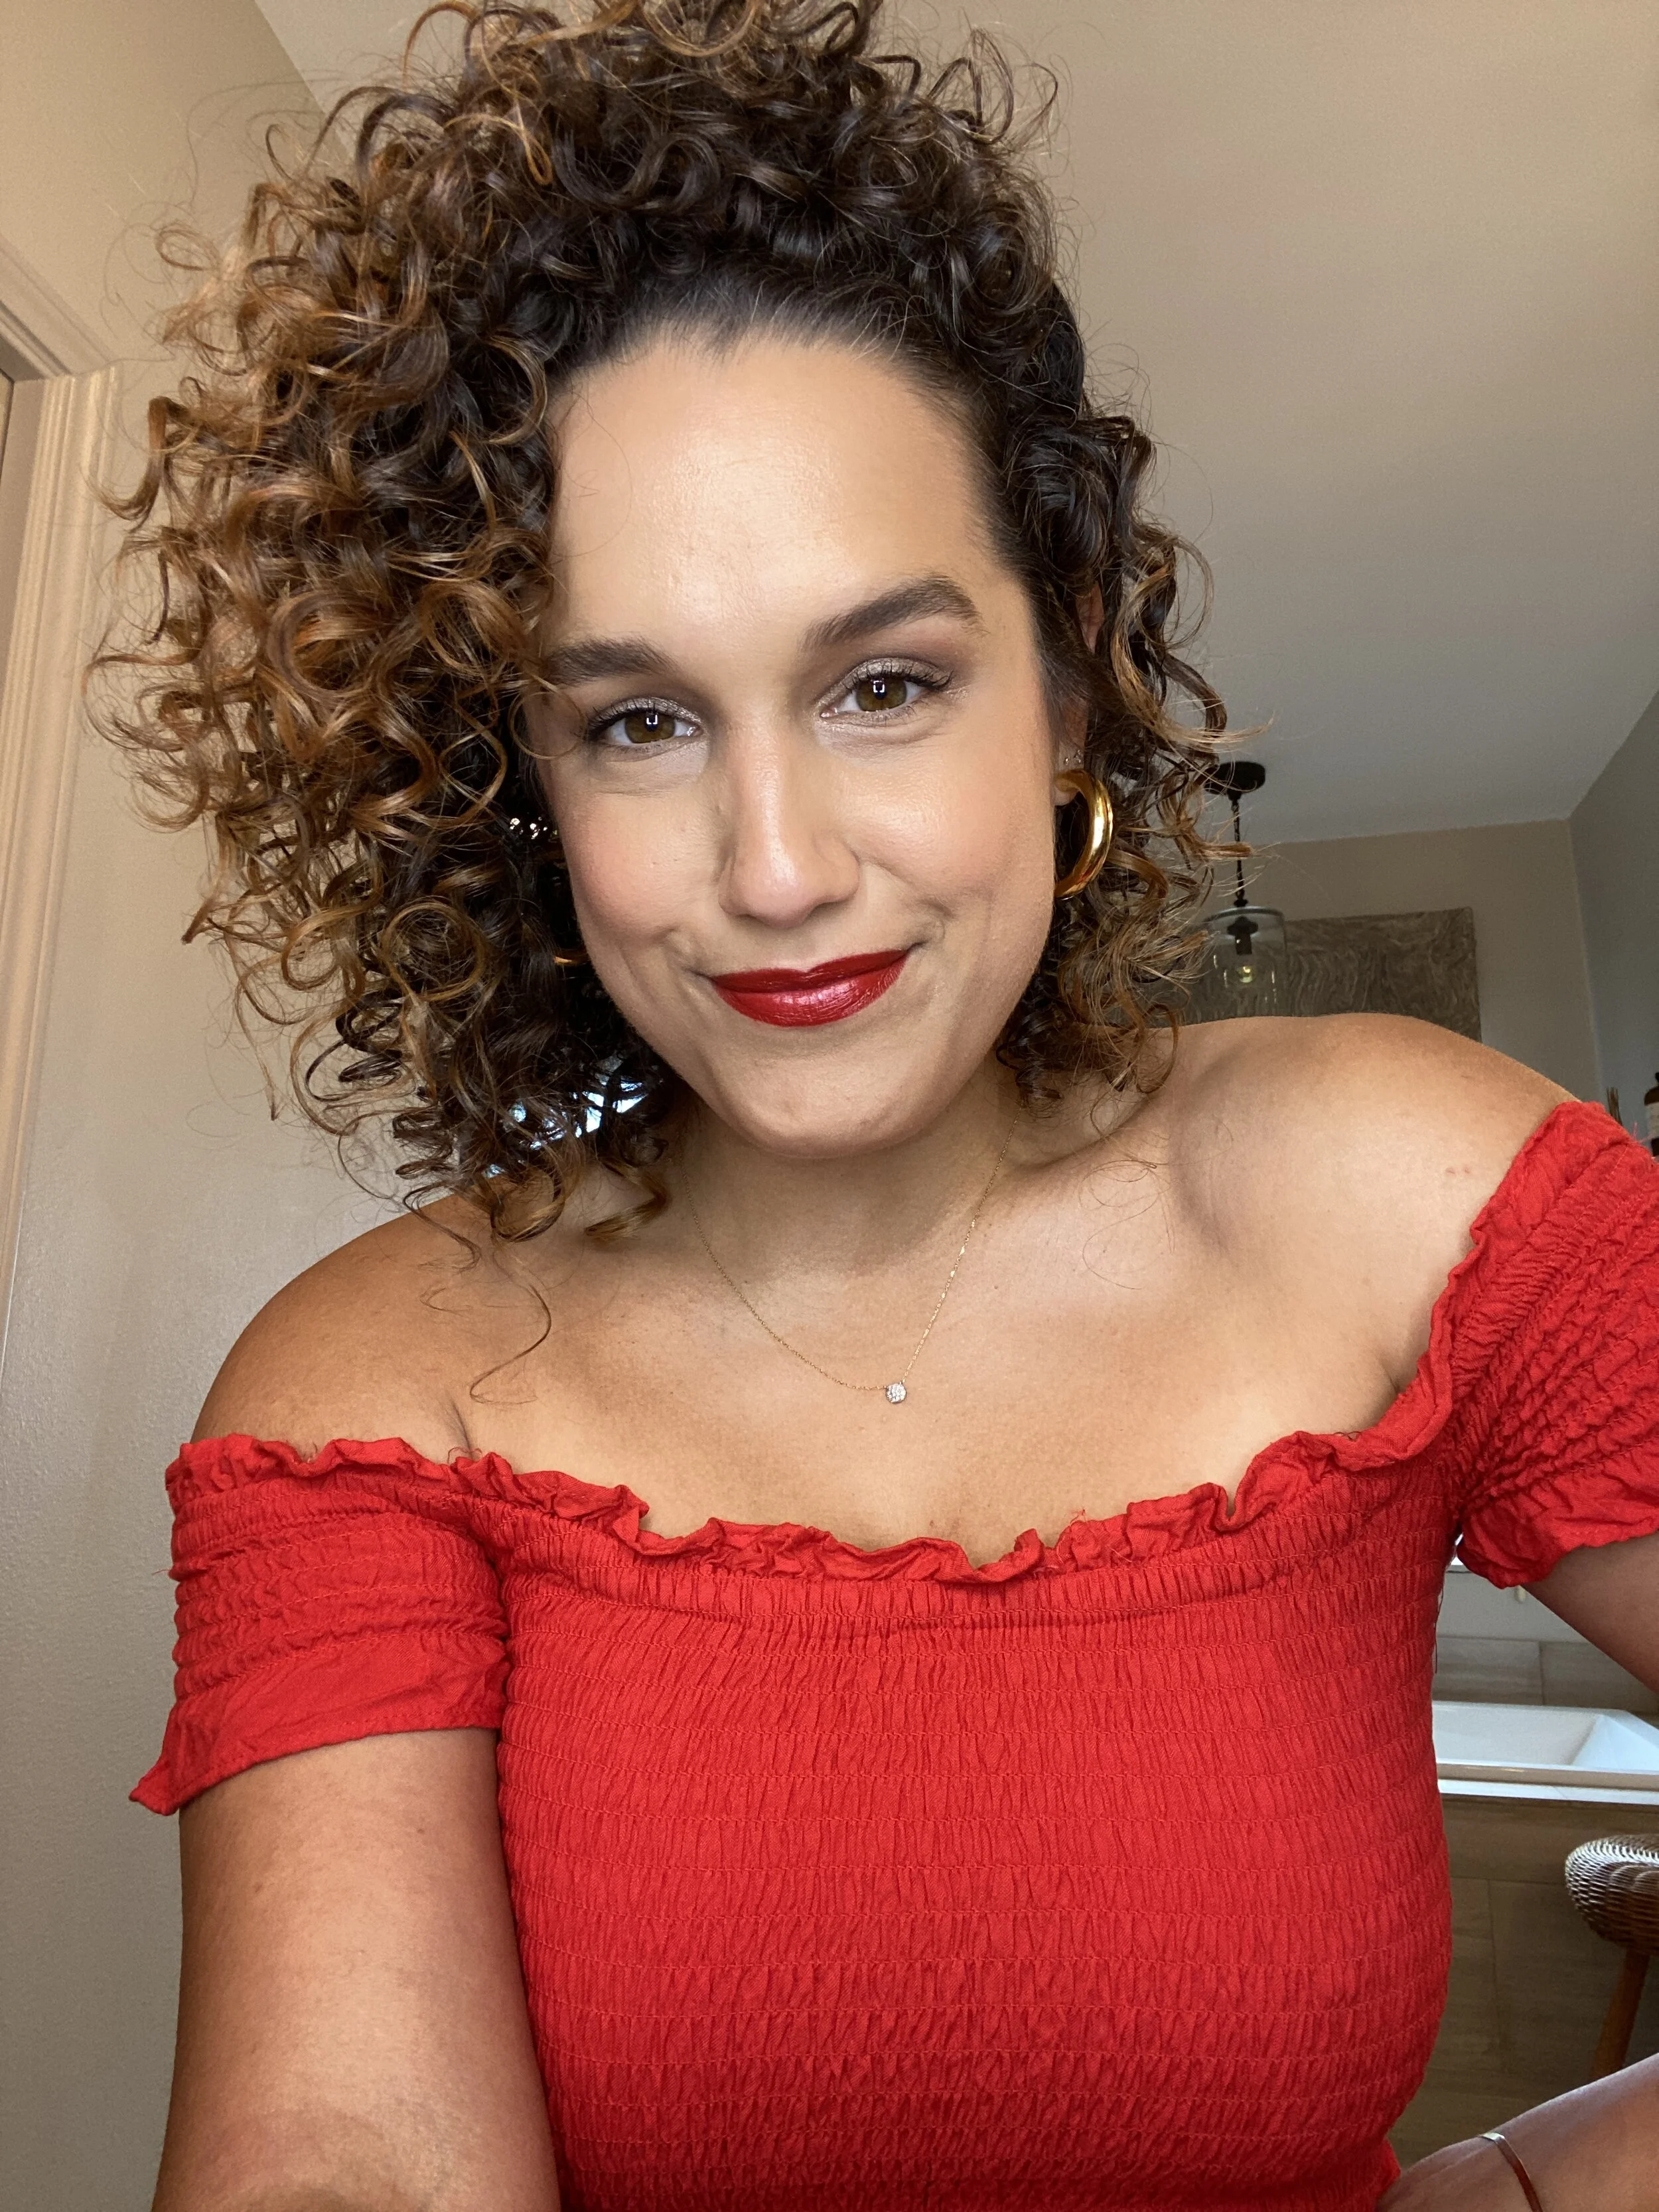
I got ready for a super fancy date night last week and was beyond proud of my finished makeup look, which led me to this post. I have actually changed my foundation and concealer recently and thought a quick makeup breakdown never hurt nobody, so why not share what my process is so we can all process it together? So here she is: my exact makeup routine that I performed on my face last week from start to end. Take notes (or simply just scroll through and get distracted by something else and leave me for dead. What do I care?).
Step 1: foundation
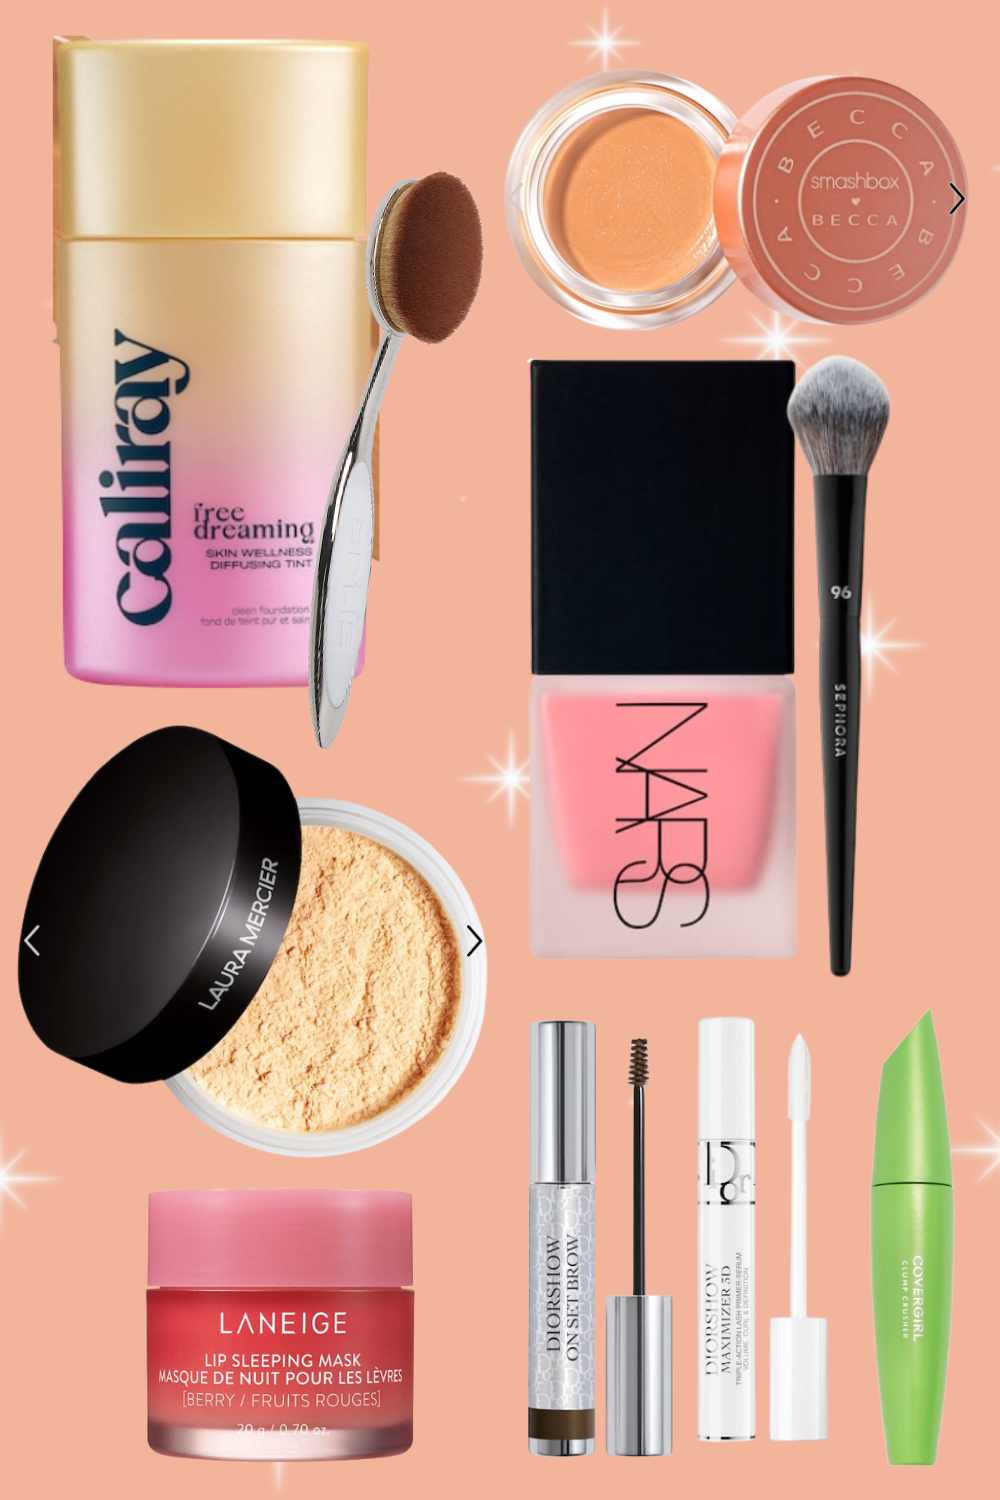
For literal YEARS, I’ve used Charlotte Tilbury’s Magic Foundation. I sung its praises, pushed it on friends (no one ever bit, it’s fine), and swore it was the only foundation for me. Well, during my latest skin freakout, I decided CT was part of the problem so I researched the best foundation for sensitive skin and was led to the product I’ve heard so much about and never tried: Armani Beauty’s Luminous Silk Perfect Glow Flawless Foundation. That day, I went into Sephora, had them color-match me, bought it, and have been using it ever since. It literally feels like silk and one pump goes a LONG way, so it’ll last you a while. I ended with shade 6.25 if that helps anyone! I absolutely love this foundation.
Step 2: concealer
I didn’t mean to be so basic (or are we saying cheugy now? I literally can’t keep up. I hate being old), but Tarte’s Shape Tape was suggested to me and I bit and I love it. ¯\_(ツ)_/¯ It is what it is, and it’s really good shit. I use it very lightly, and even that does a lot for my undereyes and blemishes. I have it in 35N medium. Sometimes I’ll pat it in with my ring finger, sometimes I’ll wet a beauty blender sponge and do it that way. Both methods work and Shape Tape really works and covers up what you need covered.
Step 3: Blush
If you’ve an avid follower/reader, you know this and have known this for years but I swear by cream blush. I have literally used The NARS Multiple stick in the color Portofino since college. No, really. It’s been that long and I haven’t changed. I just love the look, the consistency, everything. HOWEVER, what I did recently change is how and where I apply it. You see, I have seen many makeup videos of girls placing their blush higher near the cheekbone under your highlighter rather than on the apples of their cheeks and blending it downwards. I tried it and OMG—it looks so much better??? Blush placement literally changes the shape of your face. Watch this video to be astonished like I was and then try it.
step 4: Contour and Highlight
Like I said earlier, I’ve kept my routine so basic for so long, that adding in contouring and highlighting is a very recent development that I’m still learning. I started off slow and simple with the mini version of Charlotte Tilbury’s Bronze & Glow Contour Duo and love it. I got the accompanying brush to apply it with, and that works beautifully, too. I do very minimal contouring on my lower cheek/jawline and my hairline, and that’s enough for me! Then I use highlighter on my cheek bones/temples, down the middle of my nose, and a dot on my upper lip, mid forehead, and chin. Done and done.
step 5: setting powder
Laura Mercier’s Translucent Loose Setting Powder is iconic, and they rolled out two more shades of it last year (or before that? IDK) to better match more skin tones. I have it in the honey shade for medium skin tones, and it’s perfect. I just take my big powder brush by Real Techniques, dab it into the loose powder, and sweep it gently across my face to say to my makeup, “Bitch, you better not.” Works like a charm.
step 6: eyebrows
The most important step, no? I don’t do anything to my eyebrows in terms of grooming. I don’t get them waxed or threaded or microbladed or shaped in any way. Maybe I should, but again—ya girl is fighting the good fight against high maintenance beauty. I simply use a little setting gel by Nyx that has cannibas and sativa seed oil infused into it (surprised I don’t get high as fuck considering how sensitive I am to the weed) to get them prepped, then when that’s dry, go over them with Charlotte Tilbury’s Legendary Brows Eyebrow Gel in the dark brown shade. And let me tell you, I used a LIGHT TOUCH here. Or at least I try to. The days I am too heavy-handed, I look like Groucho Marx and no one wants that. I love this stuff—it’s not thick and heavy duty, and the application brush itself is very slim and fine to give you a natural finish.
step 7: mascara
If you are buying mascara that’s more than $10, you are literally just trying to be extra so you can tell people you use super expensive mascara. I used an expensive one for years, then when I heard that Beyonce’s makeup artist swears by L’oreal’s Voluminous Lash Paradise mascara, I bought it and haven’t changed since. It’s SO. GOOD. Y’ALL. You only need two coats (and sometimes just one if you’re being casual), and it not only doesn’t flake or smudge throughout the day, but it makes your lashes look full, thick, and long. I absolutely am obsessed with this mascara and feel everyone should wear it. Just be sure when you buy it that IT’S NOT THE WATERPROOF ONE BECAUSE THAT SHIT LITERALLY DOES NOT COME OFF. I’ve made that mistake once and thought I had bought a bottle of super glue disguised as Lash Paradise mascara. Triple check the box, get the Blackest Black, and bat those lashes, ladies.
step 8: eyeshadow
I hardly ever wear eyeshadow if I’m being honest. Only for very special occasions and last week was just that, so I whipped out my favorite: Laura Mercier’s Caviar Stick Eye Shadow in the color Moonlight. It’s a champagne shimmer, and it’s perfect but I truly want one of every single color because she offers so many now. It’s the easiest eyeshadow for even the simplest of makeup simpletons like me. You draw it on, pat it in a bit with your finger to spread it out and create a more natural look, and you’re DONE. Love love love it.
step 9: lipstick
Don’t even get me started here. I will be buried with lipstick, multiple tubes actually. Lipstick makes my world go round and has since I was 24 (I have a vivid memory of buying Girl About Town by MAC as my first lipstick I actually wore daily). My red of all reds is Jungle Red by NARS, which they literally only sell via Amazon now meaning they probably discontinued it meaning my world will collapse sometime this year. That said, buy a tube or two now because it’s the most vibrant, true red-blue red lipstick I’ve ever found and I love it so dearly. It’s a semi-matte, too, so it doesn’t come off but it doesn’t dry you out either.
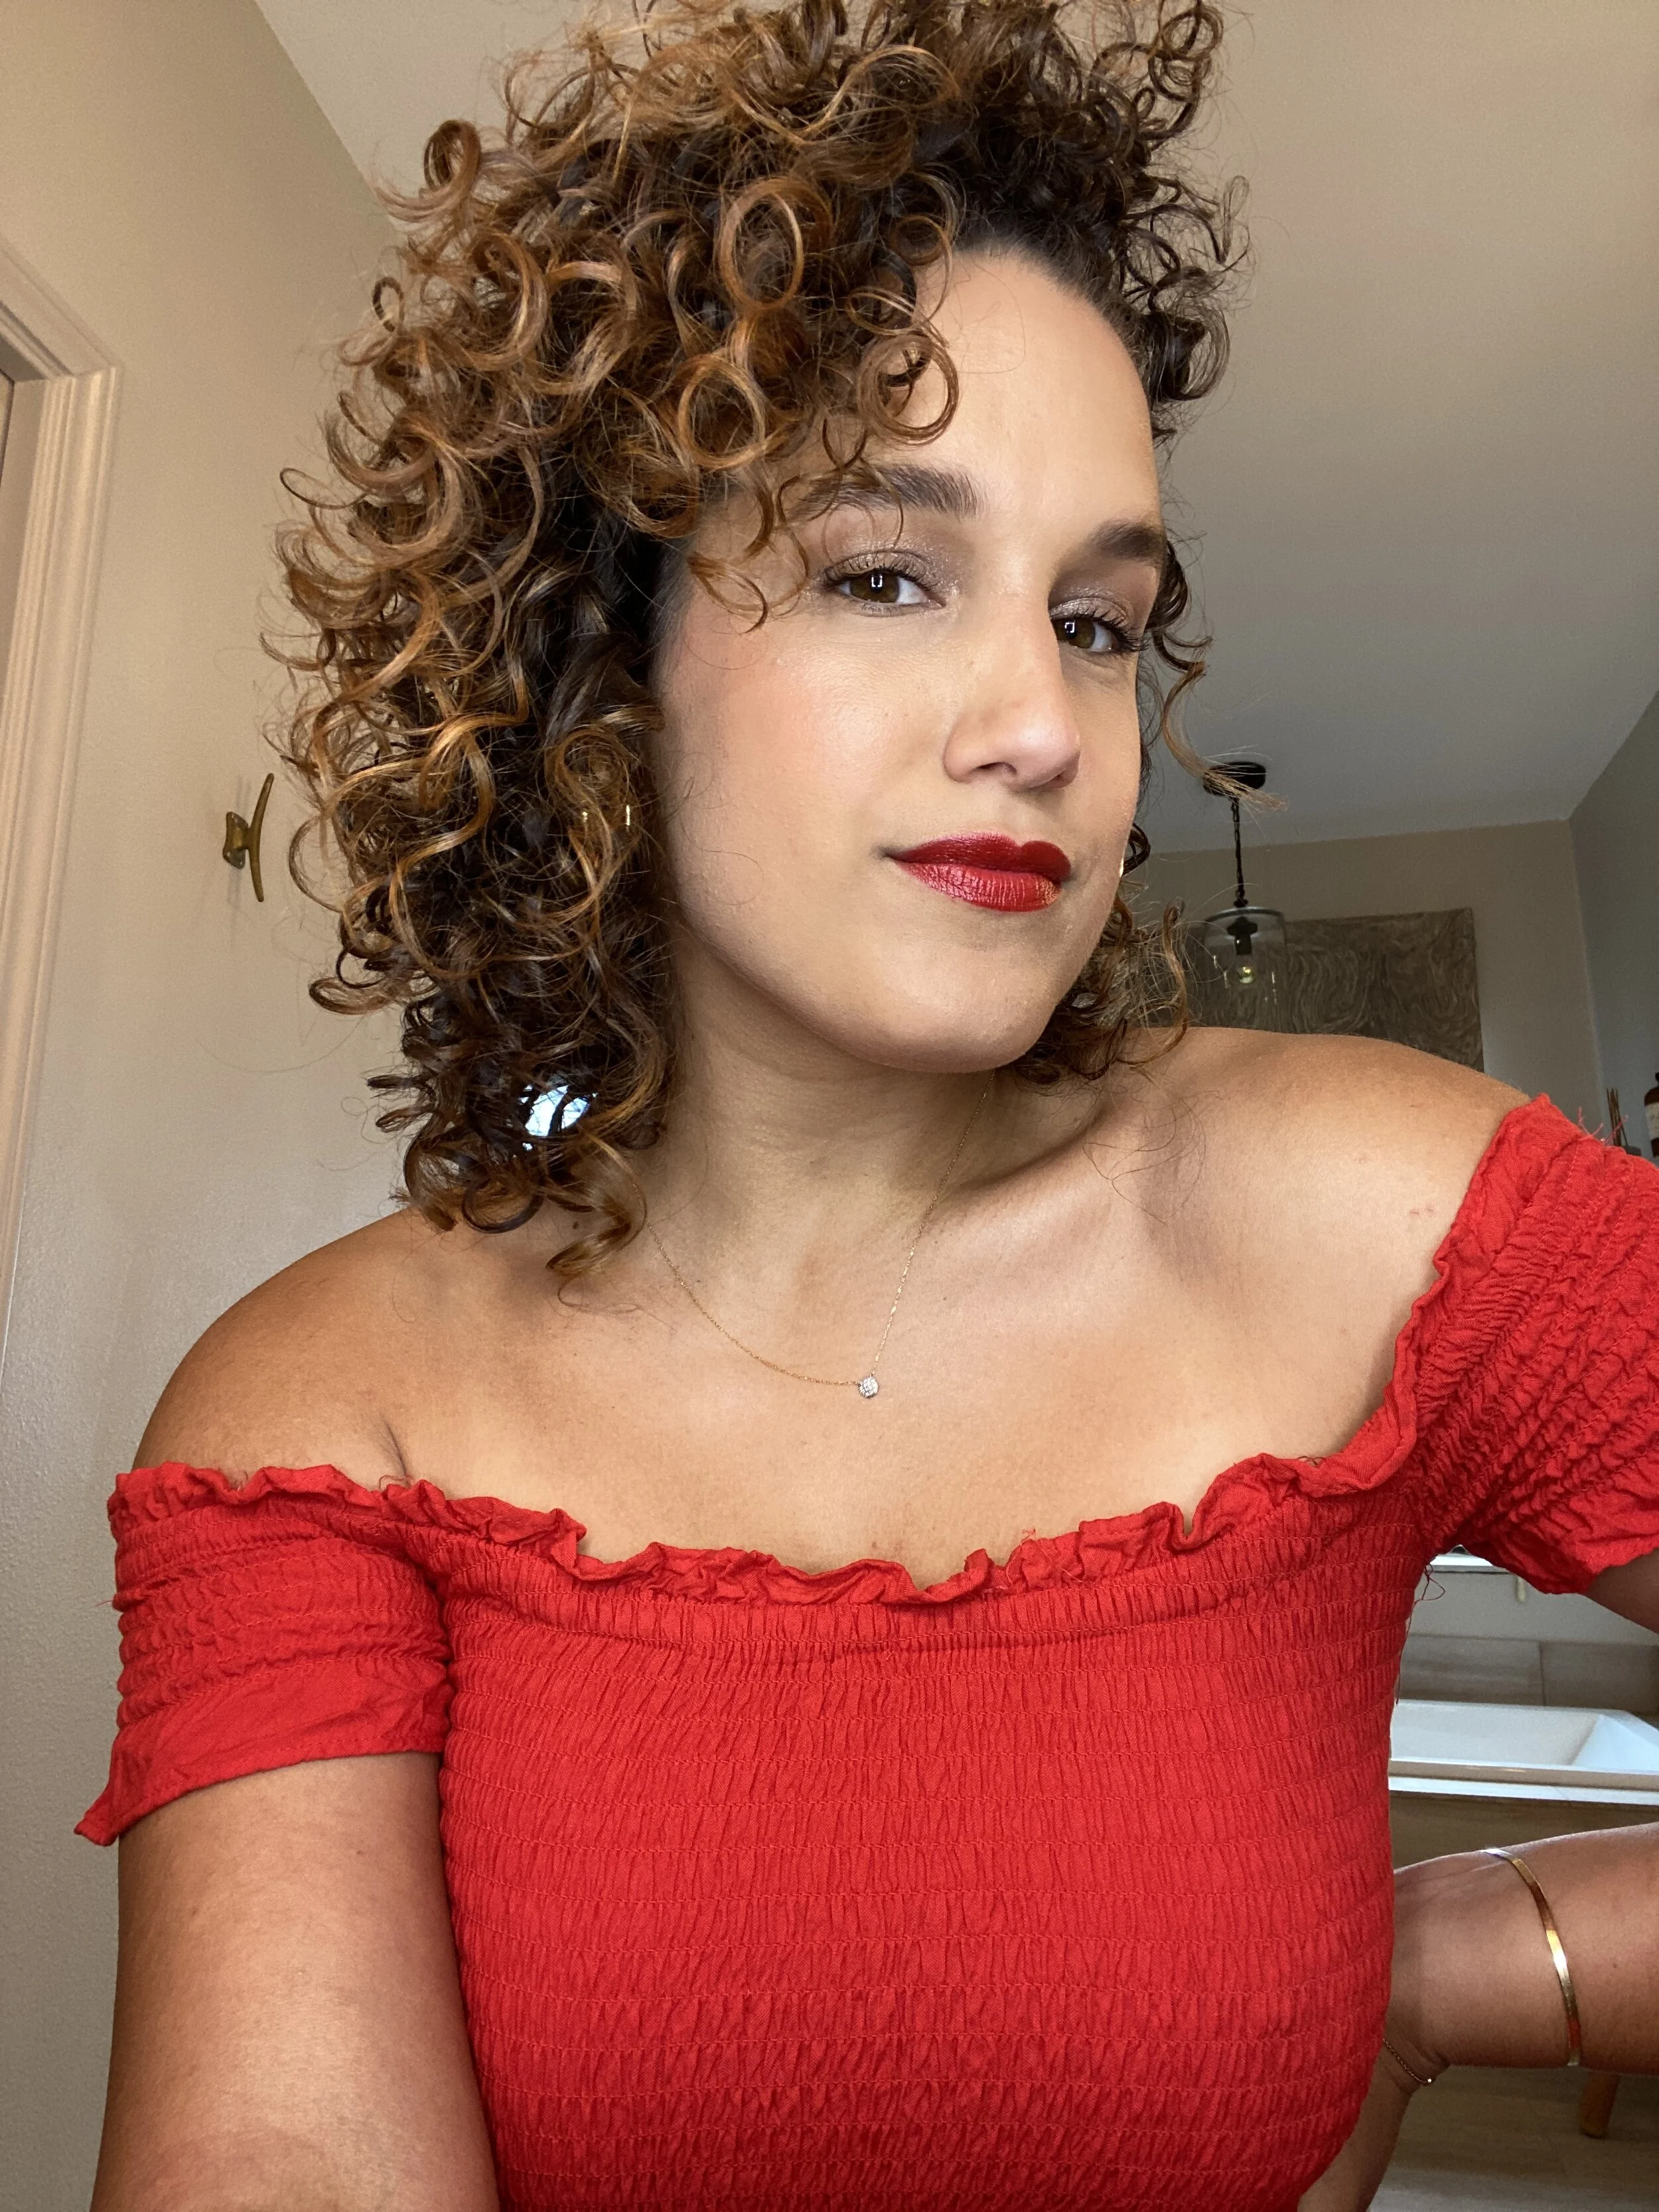
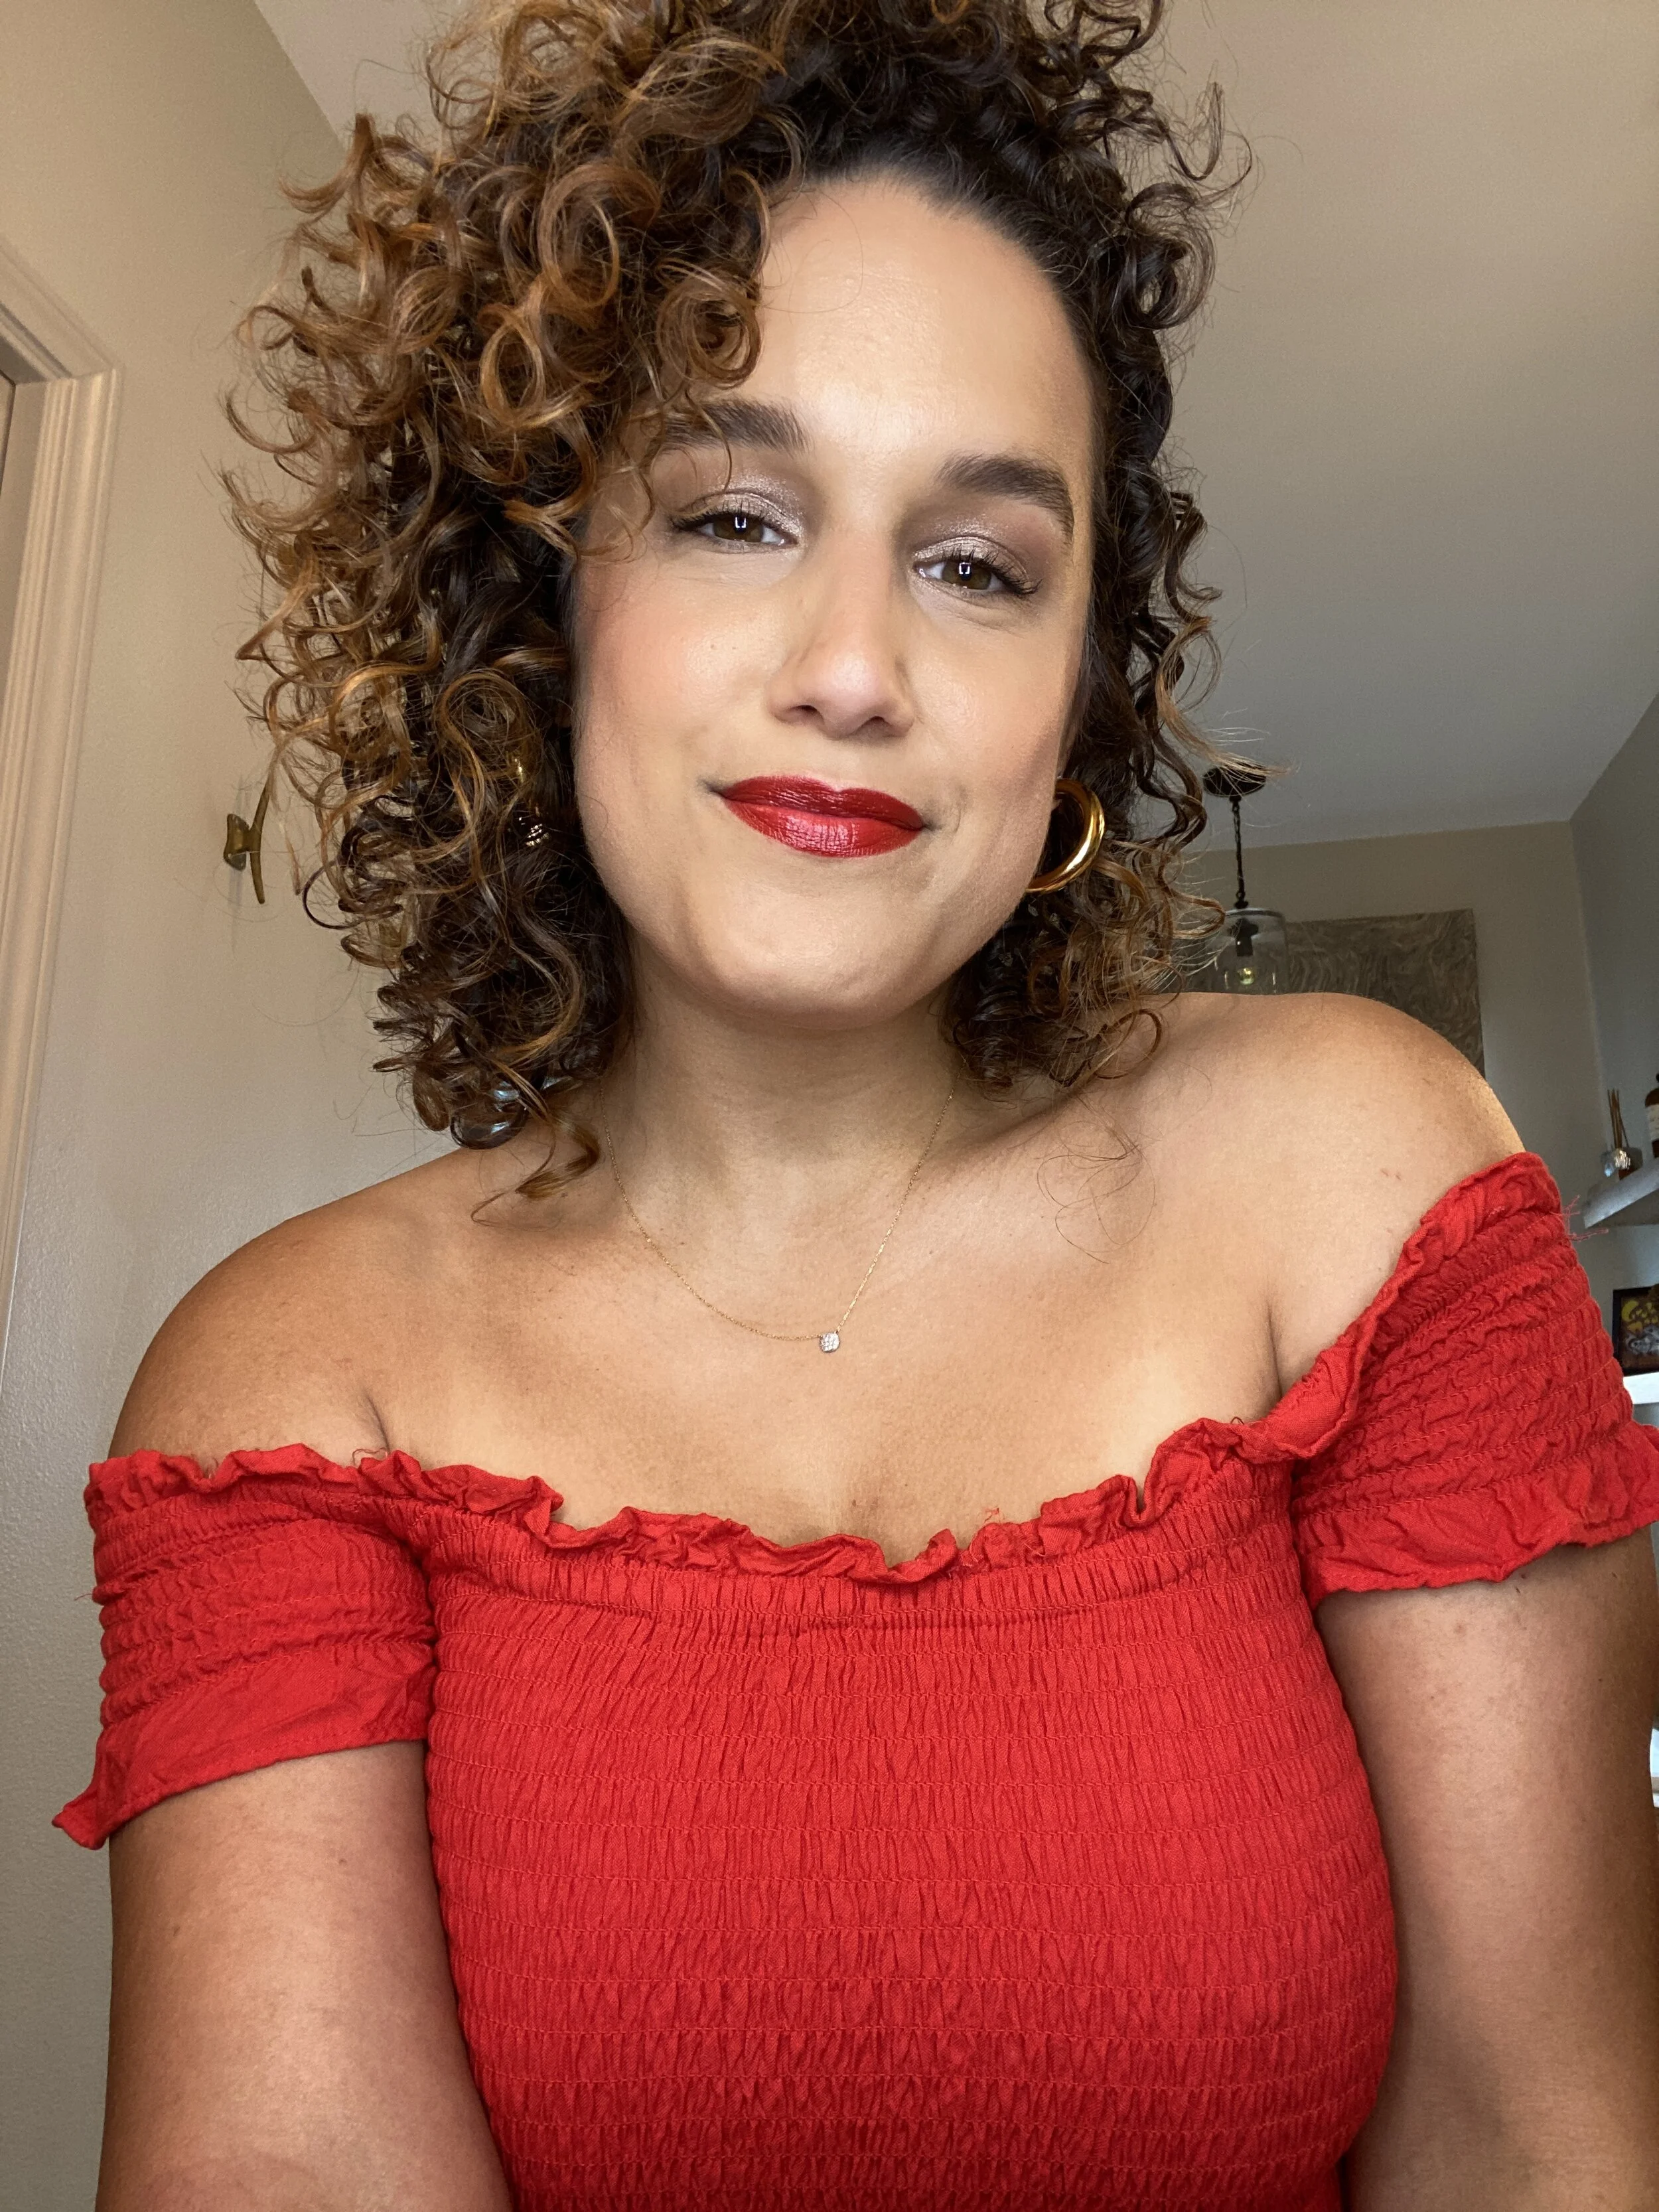
And after all that, I was ready to hit the town. Like I said, it’s pretty simple compared to what I see a lot of ladies do to their faces to get ready. If you’ve taken anything away from this post, I hope that it’s how much blush positioning changes your face shape because OMG.
SHOP MY PROD(UCTS)